Does MacBook Air Have HDMI Ports: Your Comprehensive Guide
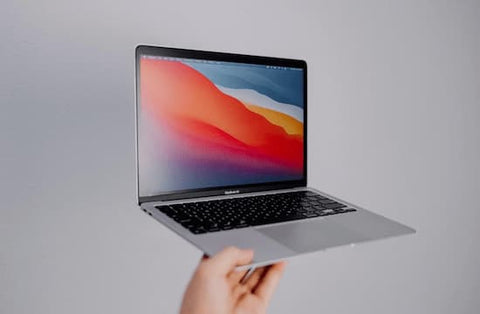
MacBook Air models are loved for their sleek design and impressive performance. However, for large-screen fans who are unfamiliar with them, one question lingers: Does MacBook Air have HDMI ports? In this blog, we’ll explore the connectivity options available on MacBook Air models, listing the benefits of HDMI display and providing a step-by-step guide on connecting your MacBook Air to an external monitor via HDMI. In addition, we'll introduce alternative connectivity options for those seeking flexibility. Let's dive in and unlock the potential of your MacBook Air now!

Overview of MacBook Air's Ports
Before delving into the specifics of HDMI connectivity on the MacBook Air, some may wonder "Does the MacBook Air have HDMI ports?". So let's first take a comprehensive look at what types of ports are available on these devices.
While the MacBook Air is renowned for its minimalist design, it doesn't skimp on connectivity options. Here's a breakdown of the ports you can typically expect to find on a typical MacBook Air model:
Thunderbolt/USB-C Ports: The primary port on the MacBook Air is the Thunderbolt port, which also serves as a USB-C port. These versatile ports support high-speed data transfer, power delivery, and video output.
3.5mm Headphone Jack: Despite the trend towards wireless audio, the MacBook Air retains the classic headphone jack. This port allows you to connect wired headphones, speakers, or external audio devices without the need for adapters or dongles.
MagSafe Charging Port: Supported by MacBook Air introduced in 2022 or later, the MagSafe charging technology delivers fast and secure charging for your MacBook laptop. To illustrate its charging prowess, the MagSafe 3 supports 140W max power delivery for your MacBook Air model.
Benefits of Using HDMI for Display
Typically, HDMI is known for the following advantages:
High-Definition Display: HDMI technology delivers crystal-clear audio and video signals, ensuring an exceptional viewing experience. Whether you're streaming movies, editing photos, or conducting presentations, HDMI enables you to enjoy stunning visuals with vibrant colors and sharp details.
High Bandwidth: HDMI cables have high bandwidth capabilities, allowing for the transmission of uncompressed audio and video data, including 4K resolution, HDR (High Dynamic Range), and high refresh rates for smooth and lifelike visuals.
Audio and Video in One Cable: Unlike traditional VGA or DVI connections, HDMI carries both audio and video signals through a single cable. This streamlined setup eliminates the need for separate audio cables, reducing clutter and simplifying your workspace.
Wide Compatibility: HDMI has become the standard interface for connecting various multimedia devices, including TVs, monitors, projectors, and gaming consoles. This widespread adoption ensures compatibility across a broad range of display devices.
How to Connect Your MacBook Air to a TV or Monitor
Connecting your MacBook Air to a TV or monitor opens up a world of possibilities, from expanding your workspace to enjoying multimedia content on a larger screen. Let's walk through the process step by step.
Gather Equipment
Before you begin, ensure you have the necessary equipment:
MacBook Air: Your MacBook Air serves as the source device for the connection.
HDMI Cable: Obtain an HDMI cable of appropriate length to connect your MacBook Air to the TV or monitor. Ensure the cable is in good condition to facilitate a reliable connection.
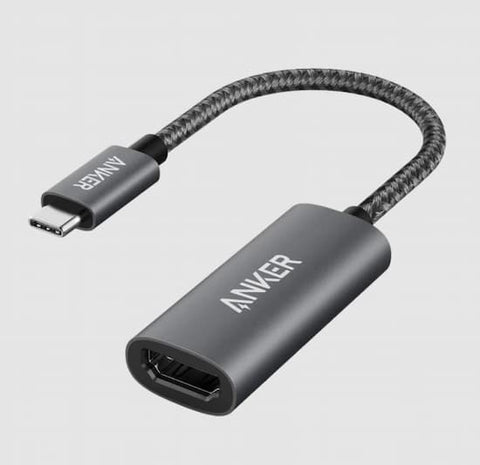
HDMI Adapters: Since MacBook Air models do not feature built-in HDMI ports, you'll need a USB-C to HDMI adapter. Choose a reputable adapter that is compatible with your MacBook Air model and offers reliable performance, such as the PowerExpand USB-C to DisplayPort Adapter.
TV or Monitor: Prepare the TV or monitor to which you'll be connecting your MacBook Air. Ensure it has an available HDMI port for the connection.

Make the Connection
Once you have gathered the necessary equipment, it is time to make the connection. Follow these steps:
Connect the HDMI Adapter to MacBook Air: Insert the USB-C end of your HDMI adapter into any available USB-C port on your MacBook Air. Ensure the adapter is securely connected.
Connect HDMI Cable to TV or Monitor: Plug one end of the HDMI cable into the HDMI port on your TV or monitor. Make sure to note the HDMI port number used for the connection.
Connect HDMI Cable to Adapter: Attach the other end of the HDMI cable to the HDMI port on the USB-C to HDMI adapter. For users who want to connect multiple laptops to the TV at a time, choosing an HDMI switch like the Anker HDMI Switch (4 in 1 Out, 4K HDMI) can help solve your problem quickly.
Configure Display Preferences
With the MacBook Air connected to the external display via an adapter, it is time to configure display settings. Using your TV remote or monitor controls, select the input source corresponding to the HDMI port to which your MacBook Air is connected. You can also adjust other settings such as resolution, refresh rate, and whether to mirror or extend. After this, your TV or monitor should recognize your MacBook Air as an input source and mirror or extend its desktop accordingly.
Alternatives to HDMI for MacBook Air
To reap all the benefits of HDMI, you need to pair your MacBook Air with a USB-C to HDMI adapter. However, this is far from the only option to enjoy larger displays. Below are some alternatives to HDMI for MacBook Air.
Using USB-C to DisplayPort Adapter
If you are using a monitor or TV that supports DisplayPort connectivity, a USB-C to DisplayPort adapter can bridge the gap between your MacBook Air and your external display. By simply plugging the USB-C end into your MacBook Air and connecting the DisplayPort end to the display's port, you can enjoy the seamless transmission of high-resolution video and audio signals enabled by DisplayPort's high bandwidth capabilities.
Wireless Display Options
For a cable-free experience, consider wireless display technologies like AirPlay or Miracast. These options allow you to mirror or extend your MacBook Air's screen to compatible TVs or monitors, offering flexibility and convenience without the need for physical connections.
Conclusion
So now let's answer "Does MacBook Air have HDMI ports?". No. However, the absence of an HDMI port on the MacBook Air doesn't hinder your ability to enjoy family movie nights on your expansive TV screen. By simply introducing an adapter, you can neatly bridge the gap, effortlessly connecting your MacBook Air to your TV for immersive viewing experiences. You can also try out our alternatives to HDMI, mirror your MacBook display to a TV, and revel in large-than-life visuals. Whichever method you choose, you are at most minutes away from the delight only a large screen can bring.
FAQs
Why doesn't my MacBook Air have an HDMI port?
MacBook Air models do not feature built-in HDMI ports due to Apple's design choices. Instead, Apple prioritizes the use of Thunderbolt ports, which offer versatile connectivity options while maintaining a sleek and compact form factor.
Can I still use an HDMI display with my MacBook Air?
Yes, you can still use an HDMI display with your MacBook Air by utilizing a USB-C to HDMI adapter. These adapters allow you to connect your MacBook Air's USB-C port to an HDMI display, enabling seamless transmission of audio and video signals.
What do I do if my HDMI connection isn't working with my MacBook Air?
Please try the following troubleshooting steps:
Check connections: Ensure all cables are securely plugged into the correct ports on both your MacBook Air and the HDMI display.
Restart devices: Power off both your MacBook Air and the HDMI display, then restart them.
Check display settings: Check the display settings of your external monitor to make sure it recognizes your MacBook Air as an input video source.
Contact support: If none of the above steps resolve the issue, contact Apple Support or the manufacturer of your HDMI display for further assistance or troubleshooting guidance.


