

HDMI Setup: How to Switch to HDMI on Laptop
If you enjoy computing and multimedia setups, you are likely familiar with HDMI – the High-Definition Multimedia Interface. This method transmits unaltered video and both compressed and uncompressed digital audio from a source device, such as a computer monitor that conforms to HDMI standards. Other gadgets fitted with HDMI ports gain similar advantages. The following instructions explain how to change your laptop’s output to an HDMI connection with a clear and practical approach.
How to Connect HDMI to Laptop?
Below, you will find two straightforward techniques for linking your laptop to an external display.
Direct Connection
Connecting your laptop to an external display using an HDMI cable is uncomplicated. You simply need the appropriate HDMI cable and a laptop equipped with an HDMI port. Follow these instructions:
- Ensure that both the laptop and the external display are switched off.
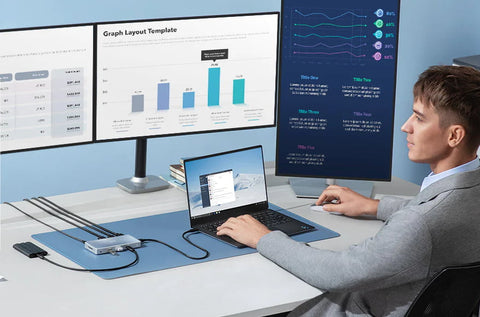
- Insert one end of the HDMI cable into the laptop’s designated HDMI port.
- Attach the other end into the HDMI input on the external display.
- Power up both devices in sequence.
- Often the laptop will immediately register the external monitor. If it does not, adjust the settings manually through the laptop’s display options found in the control panel (or system preferences for macOS users).
Using an HDMI Switch
An HDMI switch is useful if you need to connect several HDMI devices to a single external screen. For those who have wondered about switching between multiple HDMI inputs on laptops, utilising a switch (or hub) offers a highly convenient solution.
Proceed as follows:
- Connect the HDMI devices to the various input ports on the switch.
- Link the switch’s output port to the HDMI input of the external display.
- If needed, supply power to the switch by plugging it into an appropriate socket.
- Change the source selection on the switch to the desired input using the provided controls.
Understanding HDMI Connection
HDMI has been in use since 2002 and has become the standard connection method for transmitting digital audio and video in a single cable. The evolution of HDMI reflects significant changes in how we connect and experience multimedia content in modern environments such as offices, lecture theatres and home entertainment setups.
Explanation of HDMI
HDMI stands for High-Definition Multimedia Interface and provides a digital means to transmit video and audio signals directly from one device to another. Previously, connections often required separate cables for video (using VGA, for example) and audio. HDMI simplifies this process by integrating both signals into one cable, making set-ups neater and reducing the number of physical connections required.
This single-cable solution delivers improved media quality by avoiding the degradation of signal that sometimes occurs with analogue connections. It supports a variety of video formats including standard definition, high definition and even the very latest 4K and 8K resolutions. Whether you are watching a film, presenting at a meeting or playing a game, the clarity and consistency of the output are maintained.
Benefits of HDMI
The advantages of HDMI are evident in its widespread adoption:
- It supports superior high-definition video and sound, ensuring an outstanding multimedia experience.
- A single HDMI cable replaces multiple traditional cables, reducing desk clutter and simplifying installation.
- It is broadly compatible with a variety of modern devices, from home cinema systems to the latest gaming consoles.
- The digital, uncompressed nature of the audio and video signal ensures that there is little or no loss in quality.
- HDMI also incorporates Consumer Electronics Control (CEC), allowing users to operate several connected devices with a single remote control.

Configuring HDMI Output on Your Laptop
Once your laptop is connected to an external display via HDMI, it is crucial to adjust the output settings to ensure optimal viewing performance. The following steps provide a clear pathway to configure these settings effectively.
Accessing Display Settings
To set up your HDMI output:
For Windows users, right-click on the desktop and choose ”Display settings” from the menu. Mac users should open the Apple menu, then select “System Preferences” followed by clicking on “Displays.” Within these settings, you can decide how the display is arranged. Options typically include extending the desktop over two screens, mirroring the primary display or designating the external monitor as the main screen. A careful review of these options helps to secure the best viewing configuration tailored to your specific needs.
Changing HDMI Input on External Display
After adjusting the laptop settings, the next task involves ensuring that the external display is set to the correct HDMI input:
Locate the input or source menu on the external display’s control panel. Use the arrow or navigation buttons—often found on the remote or the display itself—to select the HDMI port you have connected your laptop to. Once the correct input is chosen, the laptop’s display should be projected onto the external screen.
Troubleshooting and Practical Tips
Though connecting HDMI to a laptop is generally straightforward, problems might occasionally arise. This section aims to provide troubleshooting advice and practical recommendations to avoid interruptions.
Common Issues
You may encounter a few typical issues:
- Unrecognised Connection: In some cases, the laptop may not immediately detect the HDMI connection. Always double-check that the cable is firmly attached at both ends.
- Display Flickering or Resolution Anomalies: If you observe flickering or resolution problems, try adjusting the settings by accessing the ‘Display settings’ again. Ensure that all cables and ports are functioning correctly.
- Audio Output Problems: Sometimes, sound may continue to play from the laptop speakers rather than the connected external display. In such instances, the sound settings can be modified to assign audio to the HDMI-connected device.
Tips for Optimal Performance
To ensure you enjoy a flawless experience, consider the following recommendations:
- Always use a high-quality HDMI cable to prevent connection issues.
- Regularly update your laptop’s graphics drivers, which improves compatibility with newer displays.
- If your laptop includes more than one HDMI port, testing different ports may reveal an optimum connection.
- Adjust the screen settings to match both your personal preferences and the specific capabilities of your hardware.
- Periodically check for firmware updates for both your laptop and the external display. These updates can enhance compatibility and ensure sustained performance over time.
Considerations for Using HDMI with Your Laptop
Prior to establishing an HDMI connection, it is wise to consider a few key factors that directly influence both compatibility and overall performance.
1. Compatibility
Confirm that your laptop indeed supports HDMI output. Note that not every laptop comes equipped with an HDMI port. In instances where it is absent, you may require an adapter or a docking station to achieve the desired connection.
2. Display Quality and Resolution
Evaluate the external display’s resolution. High-definition screens may require not only a suitable HDMI cable but also a graphics card capable of handling higher resolutions. This is crucial to ensure there is no compromise on picture clarity.
Conclusion
In this article, we have provided a clear and comprehensive explanation of how to switch your laptop’s output to HDMI. From direct cable connection to using an HDMI switch, each method is outlined with precision to help you attain a better multimedia experience. Whether it is for professional presentations or personal enjoyment at home, the steps provided here equip you with the necessary information to maximise your device’s functionality.
FAQs
How do I switch on HDMI on my laptop?
To activate HDMI on your laptop, first verify that your machine includes an HDMI port. Connect an HDMI cable from your laptop to the external display, then access the display settings via the control panel (or System Preferences for macOS). Select ‘Detect’ to register the external monitor. You can then choose to have it serve as either the primary or a secondary display according to your requirements.
How do I set my monitor to receive HDMI?
To have your monitor accept an HDMI connection, attach the HDMI cable from the monitor to your laptop or desktop computer. Open the display settings on your device to select the connected monitor as the main display. Should the monitor not automatically switch to the correct HDMI input, consult the monitor’s on-screen menu to manually choose the relevant HDMI port.


Be the First to Know


